
To move from raw clips to a final cut, start by organizing your footage into folders and labeling them clearly. Review all clips, selecting the best takes and making notes for easy retrieval. Assemble a rough sequence, focusing on story flow, then refine by trimming clips, adjusting timing, and removing unnecessary footage. Use shortcuts and stay consistent to speed up your workflow. Keep these steps in mind, and you’ll discover more tips to streamline your editing process.
Key Takeaways
- Organize and categorize raw footage into folders with clear labels for quick access throughout editing.
- Review all clips thoroughly, flagging the best takes to focus on high-quality footage.
- Assemble a rough cut by sequencing clips to establish the story without detailed edits.
- Refine the edit by trimming, adjusting timing, and removing unnecessary footage for better pacing.
- Use keyboard shortcuts and consistent workflows to streamline the editing process from start to finish.
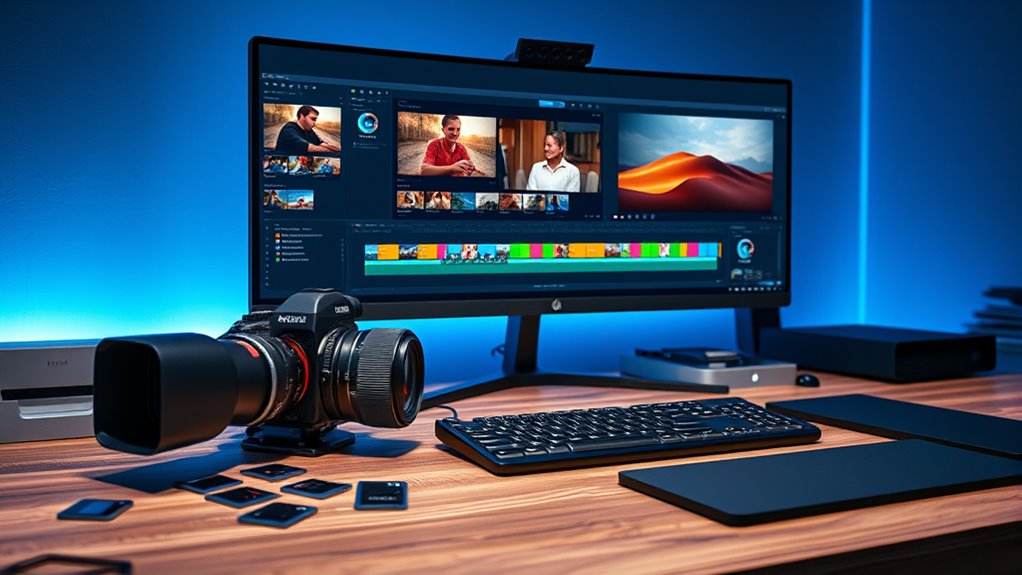
Have you ever wondered what makes an editing process smooth and efficient? It all begins with a clear workflow that guides you from raw footage to a polished final product. When you start editing, your first step is to organize your clips. This means categorizing footage by scene, date, or content, so you can find what you need quickly. Creating folders and labeling clips thoughtfully might seem like extra work at first, but it pays off in the long run. This organization reduces frustration and saves time when you’re searching for specific shots later. Additionally, understanding the fundamentals of sound design can enhance the auditory experience of your project, making it more engaging and emotionally impactful. Once your clips are organized, you’ll want to review all your footage. This initial viewing helps you understand what you have and identify the best takes. Resist the urge to cut right away—take notes on which clips stand out and any moments worth highlighting. During this phase, it’s helpful to mark or flag clips as you watch, so you can easily locate them when you start assembling your timeline. This step guarantees you’re working with the strongest footage, setting a solid foundation for your edit. After your review, you’ll move into the assembly stage. Here, your goal is to create a rough cut by placing clips in the sequence that tells your story. Don’t worry about perfection at this point; focus on the flow and narrative. Use simple cuts to put everything in order, and don’t get bogged down in details like transitions or effects just yet. This phase is about building a framework, so you can see the overall structure and make adjustments before diving into fine-tuning. As you progress, you’ll refine your edit by trimming clips, adjusting the timing, and ensuring continuity. This is where you shape the story, removing unnecessary footage and emphasizing key moments. Keep in mind that good editing is often about subtlety—small cuts can profoundly improve pacing. Regularly review your work, and don’t hesitate to seek feedback from others. Fresh eyes can catch things you’ve missed and help you improve your story. Throughout this process, maintain your focus on efficiency. Use keyboard shortcuts, preset your workspace, and utilize editing tools to speed up repetitive tasks. Remember that consistency in your workflow minimizes errors and keeps your project on track. By following this structured approach—from organizing clips to rough cuts and refinements—you set yourself up for a smoother editing journey. When you have a clear workflow, the transition from raw footage to a compelling story becomes much more manageable and rewarding.

Seagate Portable 2TB External Hard Drive HDD — USB 3.0 for PC, Mac, PlayStation, & Xbox -1-Year Rescue Service (STGX2000400)
Easily store and access 2TB to content on the go with the Seagate Portable Drive, a USB external…
As an affiliate, we earn on qualifying purchases.
As an affiliate, we earn on qualifying purchases.
Frequently Asked Questions
What Equipment Is Essential for a Smooth Editing Workflow?
You need a powerful computer with ample RAM and a fast processor to handle editing smoothly. A high-resolution monitor helps you see details clearly, while a reliable external hard drive ensures quick storage and backups. A good quality mouse and keyboard improve your workflow, and, if you’re color grading, calibrated monitors are essential. Additionally, a graphics card optimized for editing tasks can markedly speed up rendering and playback.
How Do I Organize My Footage Efficiently?
You should create clear folders and consistent naming conventions to keep your footage organized. Use a dedicated drive or cloud storage for quick access and backups. Tag clips with keywords for easy retrieval later. While it’s tempting to keep everything in one place, separating footage by scene or date saves time during editing. This structured approach helps you find what you need quickly, turning chaos into a streamlined, efficient workflow.
What Are Common Mistakes to Avoid During Editing?
You should avoid rushing through your edits, as it can lead to mistakes or overlooked details. Don’t forget to back up your project files regularly to prevent loss. Overusing effects or segue can distract viewers, so use them sparingly. Ignoring audio quality or syncing issues also damages your final product. Finally, neglecting to review your edits critically might cause you to miss errors, so take time to watch your work objectively.
How Can I Improve My Editing Speed?
You can improve your editing speed by organizing your footage early, creating a clear workflow, and using keyboard shortcuts to save time. Practice regularly to develop muscle memory for common tasks. Limit distractions, set specific goals for each session, and avoid overthinking each cut. Additionally, customize your workspace to suit your editing style, and learn your editing software’s features thoroughly to work more efficiently.
Which Editing Software Best Suits Beginners?
If you’re new to editing, try Adobe Premiere Elements or iMovie. Both are user-friendly and designed for beginners, offering intuitive interfaces and helpful tutorials. Premiere Elements has powerful tools without the overwhelming complexity of professional software, while iMovie works seamlessly on Mac devices. You’ll find these programs allow you to learn editing basics quickly, helping you build confidence and improve your speed as you practice.

XPPen Mini Keydial ACK05 Wireless Shortcut Keyboard Bluetooth Programmable Express Remote Control with Dial & Customized Express Keys for Drawing Tablet PC MacBook Windows Images Video Editing
Wireless Connection: ACK05 wireless shortcut keyboard supports bluetooth 5.0 connection directly, which is Good Design Award 2023 Winners,…
As an affiliate, we earn on qualifying purchases.
As an affiliate, we earn on qualifying purchases.
Conclusion
So, after all that, you might think the hardest part is choosing the perfect clip. But ironically, it’s actually just the start. The real challenge is shaping chaos into clarity, turning raw footage into a story. You’ll spend hours tweaking, trimming, and sometimes wishing for a magic button. Yet, in the end, it’s the patience and persistence that transform your messy clips into something worth watching—proof that great editing is a labor of love and stubbornness.

Adobe Lightroom 2026: From Beginner to Advanced: A Complete Step-by-Step Guide to Photo Editing, Organization, and Professional Workflows (Adobe Tools Mastery Series)
As an affiliate, we earn on qualifying purchases.
As an affiliate, we earn on qualifying purchases.
![WavePad Audio Editing Software - Professional Audio and Music Editor for Anyone [Download]](https://m.media-amazon.com/images/I/B1fcLEGCs6S._SL500_.png)
WavePad Audio Editing Software – Professional Audio and Music Editor for Anyone [Download]
Full-featured professional audio and music editor that lets you record and edit music, voice and other audio recordings
As an affiliate, we earn on qualifying purchases.
As an affiliate, we earn on qualifying purchases.