
To edit a multi-cam festival set efficiently, start by organizing all footage and audio in one place and sync them using automatic waveform tools. Focus on creating a rough cut by switching between angles to keep viewers engaged. Apply color correction for visual consistency and set a mood that matches the event. Refine shifts seamlessly, review the entire project, and make necessary tweaks. Continue exploring these steps for a polished, professional edit.
Key Takeaways
- Organize all footage and audio, then use auto-sync features to align multiple camera angles seamlessly.
- Create a rough cut by switching between angles to establish engagement and identify the best shots.
- Apply color grading after assembly to ensure visual consistency and set the desired festival mood.
- Refine transitions and perform color correction to maintain flow, energy, and visual cohesion throughout the edit.
- Conduct final reviews and tweaks, then export in the appropriate format for optimal audience delivery.
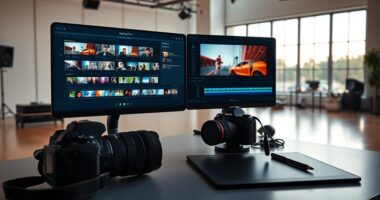
Editing multi-cam festival sets can be a complex process, but having a clear workflow makes it manageable. The first step is to organize all your footage and audio recordings. Once you have everything in one place, you need to focus on syncing your audio and video tracks. Accurate audio sync is essential because it ensures that all camera angles match perfectly with the live audio, preventing jarring discrepancies during editing. Most editing programs offer auto-sync features that align clips based on audio waveforms, saving you time and reducing frustration. After syncing, you should review the footage to identify the best camera angles for different parts of the performance. This step allows you to create a rough cut, switching between angles seamlessly to maintain viewer engagement.
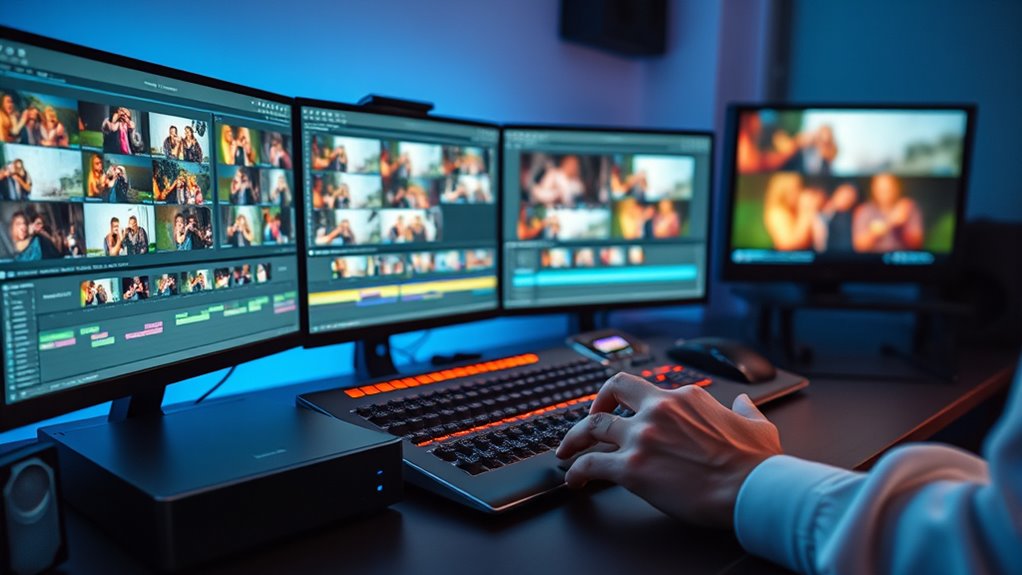
Organize footage and sync audio tracks for seamless multi-camera festival editing.
Color grading plays a critical role in elevating your multi-cam set. Once you’ve assembled the initial cut, you should apply color grading to ensure visual consistency across all camera feeds. Different cameras often have varying color profiles and exposure settings, which can make the footage look disjointed. Correcting these inconsistencies through color grading helps create a cohesive look, making the final product more professional and polished. Use your grading tools to balance exposure, enhance colors, and set a mood that matches the festival’s atmosphere. Remember, subtle adjustments often have the most significant impact, so avoid overdoing it.
As you refine your edit, pay close attention to transitions between camera angles. Smooth cuts and transitions keep the energy flowing and prevent viewers from becoming distracted. During this process, revisit your color grading and make sure the adjustments remain consistent across all clips. You may also want to add effects or overlays, but always prioritize clarity and viewer experience. Throughout this process, continually check your sync points, especially if you’re incorporating new footage or making revisions. A misaligned audio or inconsistent coloring can undermine the professionalism of your edit. Additionally, understanding the contrast ratio of your project can help you make informed decisions about enhancing image depth and clarity, ensuring your footage looks vibrant and detailed.
Finally, before exporting, do a thorough review of the entire set. Watch it from start to finish, paying close attention to audio sync, color consistency, and overall flow. Make any necessary tweaks, then export your project in the appropriate format. A well-organized, carefully graded, and perfectly synchronized edit will captivate your audience and do justice to the live performance. With this workflow, managing multi-cam festival sets becomes less intimidating, enabling you to produce a compelling final product efficiently.
Frequently Asked Questions
How Do I Manage Audio Synchronization Across Multiple Camera Angles?
To manage audio synchronization across multiple camera angles, first identify the audio lag between tracks using synchronization techniques like waveform matching or timecode alignment. Then, adjust the clips by nudging them on the timeline or using built-in synchronization tools in your editing software. Regularly check sync throughout editing, especially if the footage was recorded over a long period, ensuring all angles stay perfectly aligned for seamless multi-cam editing.
What Software Tools Are Best for Multi-Cam Editing in Festival Settings?
Did you know that over 60% of editors prefer software like Adobe Premiere Pro for multi-cam editing? For festival settings, it’s best to choose tools that excel at camera switching and project organization. Adobe Premiere Pro, Final Cut Pro, and DaVinci Resolve offer robust multi-cam workflows, making it easier to sync angles, switch seamlessly, and keep your project organized. These tools streamline the editing process under tight deadlines.
How Can I Efficiently Organize Large Multi-Cam Project Files?
To efficiently organize large multi-cam project files, start with solid metadata management by tagging clips with relevant details like camera angles and takes. Use proxy workflows to create low-res versions for smoother editing, saving your system from slowdowns. Keep your media organized in well-structured folders, and regularly back up your project files. This approach streamlines your editing process, making it easier to access and manage multiple camera angles quickly.
What Are Best Practices for Color Grading Different Camera Feeds?
Color grading different camera feeds is like tuning an orchestra for harmony. You should start by establishing a consistent look across all feeds to guarantee color grading consistency. Match camera feeds by balancing exposure, white balance, and contrast for seamless transitions. Use color grading tools like scopes and LUTs to fine-tune. Regularly compare clips side-by-side to maintain uniformity, making your multi-cam festival set look polished and cohesive.
How Do I Quickly Switch Between Multiple Camera Angles During Editing?
To quickly switch between multiple camera angles, use camera switching techniques like multi-camera editing or live cut tools within your editing software. Keep your timeline well-organized by labeling each camera feed clearly and syncing them properly. Practice seamless progression by pre-setting in and out points and utilizing keyboard shortcuts for faster navigation. This approach streamlines timeline management and makes real-time camera switching efficient and smooth during editing.
Conclusion
As you bring all the footage together, imagine the festival lights fading, the music still echoing in your mind. Your edits weave a vibrant tapestry, capturing every moment, every beat. With each cut and shift, you create a live symphony on screen—fluid, dynamic, and alive. This is your stage now, where your workflow transforms raw chaos into a seamless, unforgettable experience. The crowd may have left, but your edit keeps the festival alive long after the last note fades.